In object-oriented programming, mock objects mimic the behavior of
real objects. A programmer can typically create a mock object to test the
behavior of a real object. It is useful
when a real object is impractical or impossible to incorporate into a unit
test.
- supplies non-deterministic results (e.g. temperature);
- has states difficult to reproduce (e.g., a
network error);
- is slow (e.g., a complete database,
which will need to be initialized before the test);
- does not yet exist or can change how it react;
- would need to be included exclusively for
testing purposes (and not for its actual task).
In this post we are going to take a look at how to
replace a DbContext based data access layer with a fake in-memory location for
unit testing.
I’m going to use a simple Console application as an example.
1.
Create a table with two fields “Name” and “Number”
2.
Open SQL Server Management Studio
3.
Right Click Databases and chose new Database
4.
Give the database name as PhoneDirectory and click ok
5. Right click the table
folder and click New Table
6.
Insert three fields , ID, Name and Number
7.
The ID field is the primary key, not
null , type int and IsIdentity, and the other two files Name and Number are
VARCHAR(MAX)
8.
Save the table name it PhoneNumbers and click ok
9.
Now Open Visual Studio and click New Project
10.
Close Windows – ConsoleApplication and click ok
11.
Give the name of the Application as PhoneDirectoryApp click ok
12.
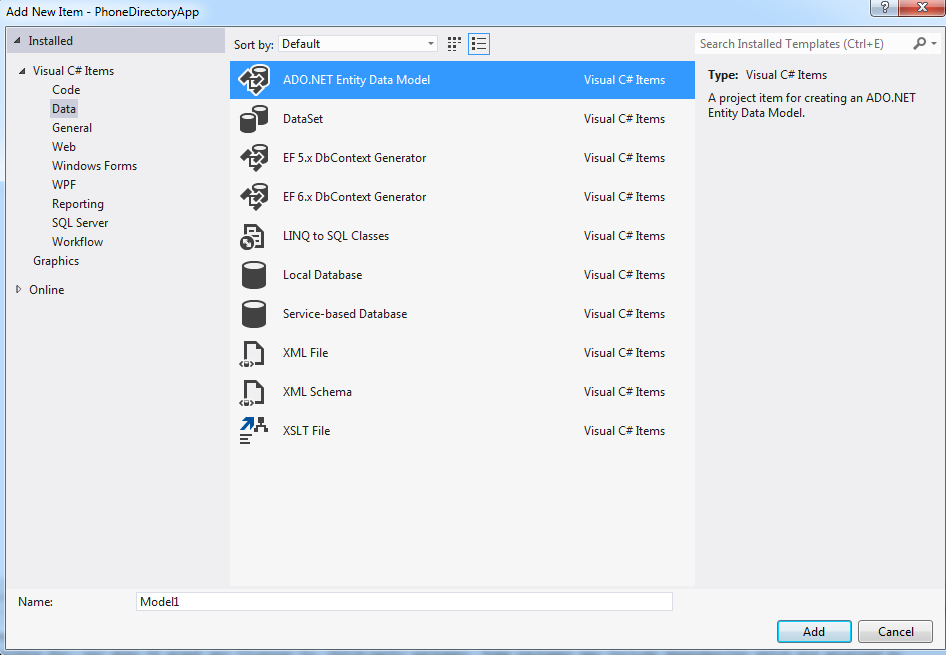
Right Click the PhoneDirectoryApp and click Add New Item
13.
Now Select ADO.NET Entity Data Model
14.
Give the name as PhoneDirectoryModel and click Add
15.
Choose EF Designer from Database and click Next
16.
Click NewConnection
17.
Now type the server name and select the PhoneDirectory database from the
list, and click ok. I have used Windows Authentication for this sample.
18.
Click next , choose Entity Framework 6
19.
Select Tables and Finish
20.
Open program.cs
file and paste the following coding
using System;
using System.Collections.Generic;
using System.Linq;
using System.Text;
using System.Threading.Tasks;
using System.Data.Entity;
namespace PhoneDirectoryApp
{
class Program
{
static void Main(string[] args)
{
string
name;
string
number;
Console.WriteLine("Enter your
name:");
name = Console.ReadLine();
// My Entity Container is called PhoneDirectoryEntities
and FindPhoneNumber is the class which has the method LoookupNumber
FindPhoneNumber find = new FindPhoneNumber(new PhoneDirectoryEntities());
// The LookupNumber function returns the number for the
given name
number = find.LookupNumber(name);
Console.WriteLine("The Phone number of
"+ name + " is " + number);
}
}
}
21.
Right click PhoneDirectoryApp and click Add – New Class and name it FindPhoneNumber
and click Add
22.
Paste the following code inside FindPhoneNumber.cs
using System;
using System.Collections.Generic;
using System.Linq;
using System.Text;
using System.Threading.Tasks;
namespace PhoneDirectoryApp
{
public class FindPhoneNumber
{
//
PhoneDirectoryEntities is my entity container name
private PhoneDirectoryEntities _context;
//Constructor
public FindPhoneNumber(PhoneDirectoryEntities context)
{
_context = context;
}
// method which
returns the number for the passed name
public
string LookupNumber(string userName)
{
var query = (from a in _context.PhoneNumbers
where a.Name == userName
select a).FirstOrDefault();
return
query.Number;
}
}
}
23.
Go back to SQL Server Management studio and enter some values for the rows
of the table created by right clicking the table name and selection edit top
200 rows
24.
Save the table and exit SQL
Management Studio
25.
Now Execute the Visual studio project by pressing Control + F5
26.
When you enter a name the corresponding number will be displayed.
27.
Now we know the application is working; now we shall mock test the
application. In reality it is best to write the test before developing the
actual coding.
28.
Right click the solution and Add new Project and give it the name MoqUnitTest
and click ok.
29.
Paste the following code in the UnitTest1.cs file
using System;
using Microsoft.VisualStudio.TestTools.UnitTesting;
using System.Collections.Generic;
using System.Data.Entity;
using System.Linq;
using Moq;
using PhoneDirectoryApp;
namespace MoqUnitTest
{
[TestClass]
public class UnitTest1
{
[TestMethod]
public void TestMethod1()
{
//PhoneNumber is the name of my table which stores name
and phone numbers
var data = new List<PhoneNumber>
{
new PhoneNumber {Name = "Ani",Number="123" },
new PhoneNumber { Name = "Kevin",Number="1234" }
}.AsQueryable();
//Arrange pass the database set to The Mock Database Table
var mockSet = new Mock<DbSet<PhoneNumber>>();
mockSet.As<IQueryable<PhoneNumber>>().Setup(m =>
m.Provider)
.Returns(data.Provider);
mockSet.As<IQueryable<PhoneNumber>>().Setup(m =>
m.Expression)
.Returns(data.Expression);
mockSet.As<IQueryable<PhoneNumber>>().Setup(m =>
m.ElementType)
.Returns(data.ElementType);
mockSet.As<IQueryable<PhoneNumber>>().Setup(m =>
m.GetEnumerator())
.Returns(data.GetEnumerator());
var mockContext = new Mock<PhoneDirectoryEntities>();
mockContext.Setup(c =>
c.PhoneNumbers).Returns(mockSet.Object);
//Act Pass the mocked objects to the class FindPhoneNumbeR
FindPhoneNumber find = new FindPhoneNumber(mockContext.Object);
//Assert Find if the number returned for each person is
the expected value
Assert.AreEqual("123", find.LookupNumber("Ani"));
Assert.AreEqual("1234", find.LookupNumber("Kevin"));
}
}
}
30.
Moq and Entity Framework needs to be referenced using the following steps.
31.
Install Entity Framework via Nuget for the test project
32.
Now you need to install Moq via Manage NuGet Package for Solution
33.
Click Install Moq: an enjoyable mocking Library , then ok
34.
You will also need to Right click Reference of the Unit test project to Browse
add a reference to PhoneDirectoryApp
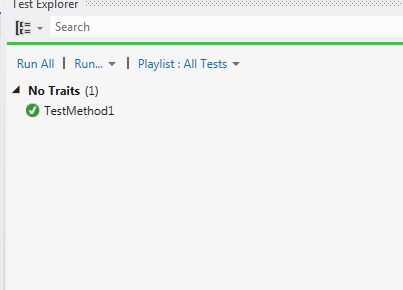
35.
Now run the test through the Microsoft test explorer
This application may be downloaded
from https://github.com/shaliniac/ShaliniNETSamples/tree/master


